Hill Line Defence (Programmed Wargame Scenarios 1)
Back in the first lockdown I decided to give the scenarios in the Programmed Wargame Scenarios book a try. I controlled the attacking Royalist force, whilst the defending Parliamentarian force would be controlled by the rules given in the scenario, I will be using the Twilight of Divine Right rules again as I really like them.
So, the background to this hypothetical battle is as follows. The year is 1643 and King Charles feels that it is time that he needs to retake London, so he marches the Oxford Army south east towards Henley on Thames, little does the King know though that his plans have been betrayed to Parliament and part of the London Trained Bands have been mustered and are moving to intercept the Kings army to delay them until Essex can bring his army into play.
Just north of Henley the vanguard of the Kings army approach a vital road junction only to find that several London Trained Band regiments had got there first and deployed onto a ridge blocking the route the King needs to take. The vanguard are ordered to clear the ridge and to push aside the Parliamentarian forces, no finesse is needed.
The Parliamentarian commander is ordered to hold the ridge line but to give ground to maintain a proper defensive line. The reserve is to only be committed to fill any gaps in the line.
 |
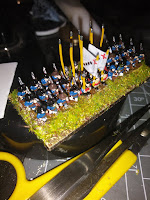
| Hill Line Defence - Set Up |
The Royalist Left Wing consisted of two Foot Regiments, one Horse Regiment and two field guns. The Right Wing had three Foot Regiments, two Horse Regiments and a Regiment of Dragoons.
The Parliament forces consist of five London Trained Band Foot Regiments, one Regiment each of Horse and Dragoons and two field guns.
The battle starts with the Parliament field guns bombarding one of the Royalist field guns and a Foot regiment on the right wing, in response the Royalists begin to advance on the ridge while both field guns concentrate their fire on one of the Parliament guns, causing some casualties. As the Royalist advance continues one of the Parliament field guns stops bombarding the Royalist field gun and switches to bombarding the Royalist Horse regiment on the left wing, hoping to delay its advance further.
The Royalist advance continues though the orders to do so seem not to have reached the regiment of Dragoons in the wood on the right flank as they have not bothered to mount up yet. Meanwhile, the two Parliament regiments facing the Royalist right wing begin to form hedgehogs as the Royalist cuirassiers (Kings Gentlemen Pensioners) are getting closer.
 |
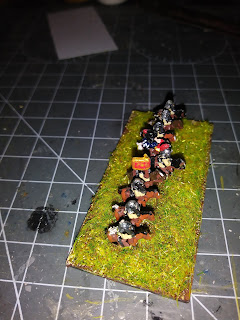
| Hill Line Defence - End of Turn 2 |
As the Royalist advance continues most regiments are either close to or past the main East-West road, with the exception of the Dragoons who have now got their orders sorted out and have mounted and are riding to catch up with the other troops. The cuirassiers are almost within charge range of the Parliament Foot regiments, however, as they are both forming hedgehogs it will not be a good idea to attack them without support. Meanwhile, the field guns manage to put the crew of a Parliament field gun to flight allowing the Horse regiment to advance untroubled. The Parliament regiments have now formed hedgehogs and are ready for the cuirassiers, the loss of the field gun was inevitable.
 |
| Hill Line Defence - End of Turn 5 |
Finally, the dragoons and Thelwell's regiment begin to ascend the ridge, in order to engage the hedgehogs. The Royalist artillery destroys the remaining Parliament Field Gun and is now free to move up to support the attack on the left wing.
The regiments on the eastern ridge begin to give ground slowly, in order to re-orientate themselves, while the reserve continues to move to plug the gap.
 |
| Hill Line Defence - End of Turn 8 |
The Royalist infantry assault begins and the Westminster Liberty regiment takes more casualties and is close to breaking. The Royalist cavalry though is still hesitant and fails to charge home. The White regiment takes some ineffectual fire from the Dragoons.
The repositioning of troops in the centre is nearly complete, whilst on the eastern ridge the White regiment halts and fires a volley at the Dragoons, who crumble and flee the field.
On the Royalist left wing, the Horse regiment charges the Parliament cavalry and forces them from the field. The victorious Royalist cavalry sets off in pursuit and passes through the Parliamentarian lines and into their rear. One of the foot regiments fires on the Yellow regiment of the London Trained Band, but no significant casualties are scored. In the east, Thelwell's regiment puts the Westminster Liberty regiment to flight, but the White regiment stands firm against a charge from the cuirassiers.
The Yellow regiment of the London Trained Band returns the fire it received causing some nasty casualties, but with Royalist cavalry rampaging in the rear, things are looking bleak.
The end comes quickly, the Royalist foot regiment on the left wing charges home against the Yellow regiment causing it to rout from the field. With his flanks collapsing the Parliament commander decided to surrender the ridge and to retire from the field.
 |
| Hill Line Defence - End of Turn 11 |
So, that was the first scenario completed. It was a fun one despite me making a couple of small errors with the rules, though neither would have changed the outcome. For future games I am going to incorporate the random event system outlined in the book to see how that works.
Comments
Post a Comment